Slab building is a fun and versatile way to build with clay. Preparation is extremely important to the success of your project, but as long as you are patient, you can do wondrous things with slabs.
Want to add a little flair and lift to your handmade plates? Aconed pedestal foot is a great way to elevate your design (literally and figuratively). This project combines simple slab-building techniques with a few professional touches — like using aGR Forms mold and a texturedMKM roller — to create a finished piece that looks refined and handmade.
Ready to take your plate-making to new heights? Let’s get rolling (pun intended).
What You’ll Need?
- Clay
- Ateco rolling pin
- Slab Mat or canvas work surface
- GR Forms plate mold (choose your preferred size)
- MKM texture roller of your choice
- Trim Gin metal rib
- Sponge
- Pencil and paper (for sketching your template)
- Knife or Needle Tool
- Banding wheel (for centering the foot)
- Plastic sheeting or a large plastic bag (for slow drying)

Step 1: Prepare Your Template
Start by sketching your plate shape on paper. You can trace your GR Forms mold or freehand your own shape — make it about½ inch larger than the mold itself to allow for trimming and shrinkage.
Cut out your template and set it aside. This extra time here ensures a clean, predictable shape later on.

Step 2: Roll Out Your Slab
Place your clay on the Slab Mat and roll it evenly using your Ateco rolling pin until it’s about¼ inch thick. If you plan to texture your plate, roll your slab a bit thicker (around⅜ inch) to allow for compression from the MKM roller.
Make sure the slab is uniform — a consistent thickness is key for even drying and a smooth plate form. To ensure an even thickness, start with the roller in the middle of the clay. Push forward, return to center, pull back. Do this 2-3 times and flip the slab over. Repeat this until it is the correct thickness.Do not roll past the end of the slab to avoid sloped edges.
It is always recommended to let a slab rest before it is manipulated. Letting your slab becomestiff but malleable will allow greater control when building. Sometimes this can take up to 24 hours depending on humidity and slab size.This "leather-soft" stage is a game-changer for avoiding warpage and tears.

Step 3: Add Texture with MKM Rollers
Here’s where the magic happens! MKM rollers can be used directly on clay but lightly dusting your clay withcornstarch prior to applying texture will prevent sticking. Once you’re ready, roll your texture roller across your slab with firm, steady pressure.
You can roll one continuous pattern or mix and match textures — the MKM rollers are perfect for creating borders, geometric designs, or organic textures.For an exclusive touch, consider creating a contrasting, untextured border by masking off the edge of the slab before rolling!

Step 4: Cut Out Your Plate Shape
Place your paper template on the textured slab and trace around it with a needle tool or sharp knife.
Remove the excess clay and smooth your cut edges with a damp sponge or yourTrim Gin metal rib to clean up any roughness. A clean edge now means less sanding later!

Step 5: Form the Plate
Lay your slab (texture side down) into yourGR Forms plate mold. Gently press and smooth it to take the curve of the mold.
Use your rib to refine the surface and ensure good contact with the mold edges.
Let the slab set up until it’sleather-hard — firm enough to hold its shape but still workable for adding the pedestal. Depending on your studio's conditions, this can take a few hours or overnight.

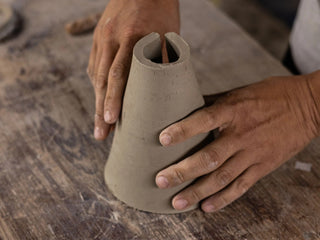
Step 6: Create the Coned Pedestal Foot
Roll a small slab and shape it into a cone shape, a template can be used to make simple shapes easily. This method works especially well when making cups.A perfectly centered foot is crucial for stability, so take your time here!
Score and slip both the base of your plate and the top edge of the cone. Gently attach the cone to thecenter of the plate bottom.

Blend the seam using your finger or a soft rib to make a smooth, secure connection.
Pro Tip: Spin the plate gently on a banding wheel to make sure the foot is centered and level. If it wobbles, gently adjust the cone until it spins true.
Step 7: Refine and Clean Up
Use yourTrim Gin metal rib to refine the plate’s curve and rim, compressing the clay to prevent warping.
Wipe gently with a damp sponge to remove any slip or texture crumbs.Check the inside curve of the foot for any trapped air bubbles or thick seams—a crack here can ruin the piece in the kiln!

Let your plate dry slowly and evenlyunder plastic for several days. Slow drying is the single best way to prevent cracks and warpage, especially with a piece that has a lot of surface area and an attachment like a foot.
Step 8: Bisque and Glaze
Once bone dry, bisque fire to your clay’s recommended temperature.
After bisque, glaze as desired. Atransparent or semi-transparent glaze works beautifully to highlight MKM textures! For an even more exclusive look, consider using anoxide wash (like iron or manganese) over the textured areas, wiping most of it off, and then applying a clear or satin matte glaze. This will make the texturepop!
Now you have a stunning, elevated plate that showcases your skill and attention to detail. What kind of texture did you decide to use?
