Terra-Sigillata
Here you will find the materials and information you need to create Terra Sigilla
Super-Refined Terra SigillataVince Pitelka Copyright, 2006
This article is used here courtesy of the author...
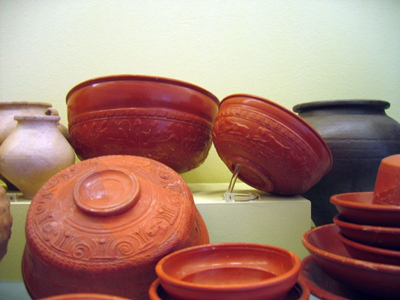
Thank you, Vince. Photo right by Andreas Franzkowiak : Roman Terra Sigillata Taken at Archäologisches Landesmusuem Konstanz, Germany
Introduction
Traditionally, the primary objective of terra sigillata refined slip coatings is to get a high satin gloss without a glaze, using simple, time-effective polishing methods. Most of the popular published terra sigillata recipes do not separate the large particles adequately, and the product is not a true terra sig. About 18 years ago, I started researching terra sigillatas in conjunction with my Ancient Clay classes and workshops at U-Mass-Amherst. First experiments were derived from standard recipes in ceramics books and magazines, and the results were unsatisfactory. I wanted to achieve what I had seen on ancient Roman pottery.
Super-refined polishing slips were first used in the Middle East at least 1000 BC, and reached a pinnacle of aesthetics and technical accomplishment with the terra sigillatas used on Greek and Roman pottery. The purity of terra sigillata is perhaps most celebrated on fine Roman Arretine wares, with the monochromatic red high-gloss coating emphasizing complex relief decoration. But like so many innovations of the Romans, technology was completely lost in the early medieval era.
1400 years later, 19th-century German ceramic chemist Henrich Schumann was seeking low-cost coatings for sanitary sewer pipes. That doesnt sound very romantic, but it drove him to make the critical rediscovery. Schumann was fascinated by the surfaces of Roman pottery and conducted a cross-section analysis of the shards. He determined that terra sigillata is a very thin coating of refined slip composed of only the very finest clay platelets. Through subsequent experimentation, he was able to reproduce high-quality terra sig surfaces. Schumann's findings guided me, and experiments conducted with students Heather Shadron and Rob Williamson at the University of Massachusetts at Amherst helped to refine the specific techniques outlined below.
Why Does it Work?
To anyone new to terra sig, it seems magical when you polish the surface for the first time. Most experienced clay workers have discovered that almost any very-hard-leather-hard clay surface can be rubbed to create a soft gloss, or burnished to create a high shine. Pure clay is composed of kaolinite crystals in microscopic particles called platelets. Kaolinite crystals are very thin and flat and are reflective on the surface, and the resulting platelets have the same reflective qualities. In normally-worked clay, the alignment of flat particles is random on the surface of the ware, and thus there is little or no reflective quality. But if you do anything to cause the platelets to lay down flat, the amount of reflection increases. When you process terra sig according to the instructions below, you eliminate all but the finest fraction of particles, and those remaining ultra-fine platelets will naturally lay flat on the surface, producing some degree of reflection. Any compression through polishing with a piece of chamois or plastic film or even with the fingertip will increase the fraction of platelets laying flat on the surface, increasing the reflected light and our perception of a shiny surface.
What's the Difference Between Polishing and Burnishing?
Polishing refers to any process that produces a shine on the clay surface. This might be achieved by rubbing the clay with your finger tips, a soft brush, a piece of chamois, a soft cloth, or a piece of plastic film, but it also includes the process known as burnishing. Burnishing is a type of polishing, and specifically involves compressing the surface by rubbing with a hard, smooth, unyielding object, like a polished rock or the back of a spoon. Burnishing processes are also found in metals, leather, wood, and fabrics, and they all fit the definition above. When you burnish a very-hard-leather-hard or re-moistened bone-dry clay surface, all of the clay platelets are forced to lay flat, while all the coarse particles are pressed down into the surface, leaving a very smooth, highly reflective surface. As mentioned below, terra sig makes a good burnishing slip, but one of the reasons we go to all the trouble to make a proper terra sig is to get a polished surface without the highly-labor-intensive process of burnishing.
Get an Appropriate Hydrometer
An appropriate hydrometer that measures specific gravity is required for this technique. A winemaker's hydrometer will not work, because it measures fluids lighter than water. Glaze hydrometers that measures specific gravity will work, but they generally have a scale reading from 1.00 (the weight of water) to 2.00, which does not offer much precision in the range needed for terra sig. The appropriate hydrometer that measures specific gravity from 1.00 to 1.20, which is the ideal range for terra sig is listed below or click here. Note that hydrometers are extremely fragile. Get at least two.
Selecting the Clay
You can make terra sig from almost any raw clay or mixed claybody, but the yield will depend on the average particle size. Finely divided air-floated clays such as Redart or Goldart and most ball clays will give a high yield of sig. Coarser clays like kaolin and fireclay give less sig and a greater amount of settled coarse residue. Dont bother trying to make a sig from bentonite - it is too fine already, and doesnt yield a good sig. The selection of the clay will usually depend on the desired color and firing temperature. See the section on Firing Ranges and Natural Clay Colors Achieved with Terra Sig for more information.
Some clays are so coarse as to give a very low yield of sig. If you choose a particular clay for compelling reasons, and the yield of terra sig is especially low, the raw clay can be ball-milled before incorporating into the initial mixture. See the section on Adding Coloring Oxides and Ceramic Stains for more information on ball-milling.
Preparing the Deflocculant
The secret of refining a proper terra sigillata is to settle out all but the very finest particles. A deflocculant is a chemical additive that causes particles in an aqueous suspension to repel one another, and it is a critical part of the terra sig process. Only a tiny amount of deflocculant is needed, and adding additional is counterproductive, so be very careful with your math and your measuring. Soda ash (sodium carbonate) and sodium silicate both work as deflocculants, but for reasons that no one seems to understand, a combination of the two work best in terra sig.
The amount of deflocculant is figured as a percentage of the dry weight of clay to be used. To a small amount of hot water, add 0.25% (1/4 of 1%) soda ash (sodium carbonate) and 0.25% sodium silicate. A hand blender will make short work of dissolving the chemicals. The sodium silicate comes as a liquid, but just measure the weight as if it were a solid.
Measuring Specific Gravity with a Hydrometer
To measure specific gravity with a hydrometer, the liquid must be in a container tall enough to float the hydrometer. If your mixing container is not tall enough, pour some of the liquid into a tall thin container. The most practical container for this application is a laboratory graduated cylinder. An appropriate plastic 250 ml. graduated cylinder.
Lower the heavy end of the hydrometer carefully into the liquid until it floats on its own, and read the scale exactly where the hydrometer tube meets the surface of the liquid.
Immediately before measuring the specific gravity with a hydrometer, always be sure to mix your terra sigillata thoroughly with a hand blender or drill-mounted impeller mixer. The sig will settle, especially in the initial mixture, and you must make sure that all particles are in suspension in order to get an accurate hydrometer reading.
Determining the Initial Mixture
For the time and trouble involved, and considering the low cost of raw clay, it is best to make a quantity of sig all at once. I never make less than five gallons of initial mixture. After settling, siphoning, and concentrating, that will yield about a half gallon of super-refined terra sigillata. A near-full five-gallon bucket of initial mixture will take about 14 lbs. of Redart, Goldart, kaolin, fire clay, or any dry claybody, or about 11 lbs. of ball clay.
Add the dissolved deflocculant mix to cold water, starting with a quart of cold water for every two pounds of dry clay to be used. Add the dry clay, blending with a drill-mounted impeller mixer. When all the dry clay is mixed in, add more cold water, mixing well, and check frequently with the hydrometer until the specific gravity reading is 1.20 for any clays except ball clays, or 1.15 for ball clays. If you are mixing in a full five-gallon bucket, float the hydrometer right in the bucket. If mixing smaller quantities, you will need a graduated cylinder or other appropriate container as mentioned above.
Settling the Initial Mixture
As soon as you have finished blending the initial mixture, note the time, and place the container on a raised table or shelf and leave it undisturbed for 20 hours. It must be in a location where you can siphon from it, and it will be a great advantage to have the bottom of the container at least two to three feet above the floor.
Dont be careless about this. Do not move or agitate the container in any way during the 20-hour settling time, or during the siphoning process outlined below. If you agitate the mix, you ruin the terra sigillata. Consistency in method and timing is critically important in making good terra sig. If you accidentally agitate the mixture, or if you let the mixture stand for longer than 20 hours, thoroughly mix it again with a drill-mounted impeller mixer, note the time, and start the 20 hours settling period again.
Why 20 Hours?
The 20-hour settling time may seem arbitrary, but its not. I am grateful to student Rob Williamson at U-Mass for helping to determine the ideal settling time. There are several forces at work in this deflocculated mix. The deflocculant introduces same electrical charges to particles in aqueous suspension, causing them to repel one another and stay in suspension longer. Also, there is ever-present atomic vibration which causes particles in liquids to naturally disperse. Working against these forces is gravity, causing particles to settle out. At 20 hours, in a deflocculated slip of the correct specific gravity, gravity has caused all the heavier particles to settle out, while atomic vibration and the repelling forces caused by deflocculation keep the finest particles (generally those less than one micron - 1/1000 of a mm) in suspension.
Decanting the Terra Sig: Get a Proper Racking Tube
The essential tool for decanting the dilute terra sig is a winemakers siphon, referred to in the winemaking industry as a racking tube or racking cane. You can get one from any supplier of winemaking equipment, including many online sources. Note that in some cases the racking tube comes with attached flexible tubing, while in other cases the tubing must be ordered separately.
An appropriate racking tube features a J-shaped rigid plastic tube attached to a length of flexible plastic tubing. An important feature of a good racking tube is the diversion cap on the suction end of the rigid tube. This allows fluid to enter above the cap rather than below, and offers real advantages in siphoning terra sig. As you gently probe downwards with the rigid tube, the objective is to sense the increased density of heavier sediments before the siphon starts to pick up those sediments, thus avoiding contaminating the terra sig. The diversion cap makes this much more feasible.
Siphoning off the Dilute Terra Sig
The upper part of the mix is now a very dilute terra sigillata, and must be carefully siphoned off, avoiding the heavier sediments lower down in the container. This is a touchy process and must be done properly with the right equipment. While siphoning, do not discard any liquid at the top. Some clays will give a seemingly transparent layer of water at the top, but this layer contains some of the very finest particles. Siphon off the transparent layer (if any) and keep siphoning until you come to heaver sediments in the lower portion of the container.
Start the siphon with the diversion cap just barely immersed in the settled mix. As mentioned above, do not agitate this container or the settled mix at all. Once the siphoning is started, gently lower the tip of the siphon tube into the mixture as the thin liquid is siphoned off, keeping the diversion tip just below the surface. The diversion cap will occasionally suck a bit of air, but that hurts nothing, and tells you that the tip is close to the surface. If it sucks too much air the siphoning action will cease, and youll have to restart it. You will quickly get a feeling for this.
With some clays such as Redart, the heavier sediments will form a distinct layer with a fairly hard surface, and you will feel that layer with the tip of the diversion cap. As soon as this happens, lift the siphon tube and stop siphoning immediately. Dont risk picking up any of the heavier sediments.
With some clays, you will never feel a distinctly heavier layer. In that case, let the suction tube suck a little air every few seconds, and note the change when the siphon naturally begins to suck more air, indicating that the mixture is getting thicker. Once again, as soon as this happens, lift the siphon tube and stop siphoning immediately.
With most ball clays, the particle size is so consistent that you never will sense a heavier layer of sediment at all. In that case, just siphon off the top two thirds of the mixture and discard the rest, and you will get a good terra sig. That may seem inexact, but there doesnt seem to be any other choice, and that bottom third seems to accommodate the heavier particles. As instructed above, in making ball clay terra sig you should start with a thinner 1.15 specific gravity initial mixture, and that helps to allow the coarsest fraction of particles to settle out, so even if you are not able to identify thicker sediments in the lower portion of the vessel, you can be sure they are there. Dont try to siphon off more than two thirds. It just isnt worth risking contaminating the sig.
With most clays, the residue of heavier sediment left in the bottom of the container represents most of the weight of what you started out with, but I have never tried to do anything with that residue. Raw clay is cheap, while terra sig is very valuable based on your time invested. The residue already has the finest particles removed, and thus is relatively non-plastic. I just discard it, but you may find a good use for it.
Concentrating the Thin Sig by Evaporation
Since the initial mixture is either 1.20 or 1.15 specific gravity, and most of the heavy particles are settled out and discarded, the siphoned mixture will be extremely thin and relatively unusable. The next challenge is to concentrate the sig by evaporating water. This can be done by natural evaporation in any wide, low container will work, such as one of those broad dish-shaped plastic snow sleds, an automotive oil-change pan, or a very large round or rectangular cake pan. Protect the concentrating sig from contamination by large particles, but dont put a cloth over it, because that will severely retard evaporation. Dont worry about bugs or the very fine particles of dust that float in the air. Those particles wont hurt the sig, and the bugs can be skimmed off.
Concentrating the Thin Sig by Heat
You can concentrate terra sig with heat, but dont do it on direct heat, like a stove burner or hotplate. The sig will solidify directly on the bottom of the pot, and the metal will burn. I concentrate terra sig in a large metal mixing bowl, placed carefully-centered on the bottom shelf of a toploader kiln, and I leave the bottom element on low overnight. It may be easier to place the empty bowl on the bottom shelf and then carefully fill it with a measuring cup, being very cautious to avoid splattering sig on the heating elements. In either case, turn off the circuit breaker feeding the kiln while you place or remove the metal container.
As another option, use a crock pot set on medium heat with the lid off. In either case, the rate of drying will depend on the atmospheric humidity and the mount of heat applied. It will take some experimentation to learn the ideal conditions.
Using the Terra Sig As Soon As It Has Concentrated
If you are in a rush to use the sig, watch it carefully, and when it has thickened considerably, scrape the thick accumulation loose and mix back into suspension with a whisk. Add water to adjust the specific gravity as indicated below.
Storing the Sig in Dry Form
If you dont need the sig right away, let it dry completely, scrape it loose from the container, and store it until needed. Drying doesnt hurt the sig in any way. 24 hours before you need to use the sig, place an appropriate amount in a container, cover with water one inch above the sig, let it sit overnight, and then add more water, checking the consistency with the hydrometer to get the desired specific gravity. If you are mixing a small quantity, a hand blender helps. For larger amounts use a drill-mounted impeller mixer to blend the sig.
Determining the Specific Gravity for Application
A terra sig must be mixed very thinly to work properly, but beyond that there are no hard and fast rules for the ideal consistency of sig for application. The thicker the sig, the less water introduced into the claybody, but the greater chance that the sig layer will crack and peel. The thinner the sig, the less chance it will crack and peel, but the more coats you will need, and thus the more water introduced into the claybody, risking cracks in the ware. For most sigs and most application methods, I have had best luck with a specific gravity of 1.15, and would not recommend using sig mixed thicker than that. This material simply does not respond well to thicker applications, and it will encourage cracking and peeling, either during drying, firing, or subsequent use. Instead, you will get the best results with multiple thin layers of terra sig.
When and How to Apply the Terra Sig
Some people recommend applying sig to leather-hard clay, but in my experience that is a waste of time unless you just want only the natural soft satin sheen sig can give without polishing or burnishing. The sig layer is pretty dense, more so if it has been polished. It doesnt have much capacity for shrinkage, and none at all if it has been burnished. Even hard-leather-hard clay will shrink as it dries, and the sig coating will crinkle on a microscopic level, diminishing or ruining any shine that is present.
I apply terra sig to bone dry clay, and get the best adhesion when the clay has been sanded. Since most of my terra sig use is in conjunction with the Ancient Clay workshops I teach, the pieces are usually sanded, as is the tradition among Southwestern Native Americans and many other cultures past and present that polish or burnish their wares. I sand with 120-grit drywall sanding mesh, available from any good building materials center.
If you sand the wares, be sure to thoroughly wipe down all surfaces with a soft cloth such as tee-shirt material in order to remove all dust. If you neglect to do this, the paintbrush will carry the dust back to your sig container, contaminating the sig.
I apply terra sigillata with a wide, thick soft brush heavily loaded with sig, laying on flowing strokes, carefully avoiding drips. If the sig does drip down the surface, chase the drips with your brush. Dont let the drips harden on the surface, and dont let the piece sit in sig pooled at the base. I work my way around the piece, building up thin coats until I get an opaque surface that begins to conceal the sanded texture. Thats still a very thin coat overall, but if you accumulate much more thickness, you are risking subsequent cracking and peeling of the sig coat.
If you wish to preserve some of the color and the surface texture of the base surface, you can get a good shine with an almost transparent coat, because the shine results from the ultra-fine clay platelets laying flat on the surface. Ultimately, its a matter of experience with your particular terra sig and base claybody. Experiment with the thinnest buildup possible, and see if it meets your needs. Build up from there to see what you can get away with.
I have applied very thin coats of terra sig to bisqueware with adequate results, but it never produces the level of shine or durability of surface achieved with a sig applied to bone dry clay. Terra sig applied too thickly on bisqueware will almost always crack and peel.
Polishing and/or Burnishing the Sig Surface
As soon as I achieve the desired sig buildup, and the wetness has soaked in, I polish the surface with a piece of grocery bag plastic stretched over my fingertips. The first time you do this, you wont believe what happens. It is magical. Grocery bag plastic is harder and denser than other plastic bag material, and gives a better shine. Some people prefer to polish with soft flannel or tee-shirt material or a soft brush, but I have had best success with the grocery bag plastic. I get a glassy shine in one polish.
Theres no reason to polish between coats. When you do polish, if you are not satisfied with the shine, you can simply paint on more terra sig. The new coat disrupts the previous shine, achieving a good bond.
It is possible to burnish any re-moistened bone-dry clay surface, but usually some sort of refined slip is applied to the base clay. A properly prepared terra sig makes an excellent burnishing slip, but if you rely entirely on the moisture introduced by the sig, burnishing must be completed in one sitting while the coating is still damp. Otherwise the surface will begin to flake and crack. To prevent this, especially with larger forms, many potters apply the sig, allow the water to absorb, apply a thin smear-coat of lard or glycerin, and let that absorb before burnishing. The grease retards drying, giving you time to finish burnishing the piece.
Even though terra sig makes a good burnishing slip, it is not the ideal use of this medium. The whole point of this elaborate preparation process is to produce a thin slip medium that polishes beautifully and gives the unique terra sig shine, but doesnt involve the labor-intensity of burnishing. After proper application of terra sigillata, the actual polishing process on a medium-sized pot using grocery bag plastic takes ten or fifteen minutes. A thorough burnishing job on the same pot takes at least two or three hours.
Firing Ranges and Natural Clay Colors Achieved with Terra Sig
A true burnished surface cannot be fired above cone 012. Beyond that, the compressed surface starts to shrink, and crinkles on a microscopic level, destroying the shine. On the other hand, highly polished (not burnished) terra sig surfaces can be fired as high as cone 02 with the polish intact. At higher temperatures, terra sigs can give an appealing satin finish, but the high shine will be diminished.
At cone 012, Redart sig gives a bright brick-red-orange color. At cone 08 it gives a classic brick red, and cone 02 it gives a red brown. At midrange and highfire temperatures, a Redart (or other earthenware clay) terra sig will fuse and become a glaze.
Stoneware clays like Goldart and most fire clays give an off-white color at low temperatures, and at midrange and high-fire temperatures will produce a tan in oxidation and gray in reduction.
Ball clays generally give white at lowfire temperatures, and an off-white or gray at high-fire.
Most kaolins produce white at all temperatures.
Red stoneware clays like Carbondale , Lizella, or Neuman red often tend to be quite coarse, but can still give a good brick-red terra sig that will survive to high-fire temperatures without fusing into a glaze. Some red stoneware clays may need to be ball-milled before incorporation into the initial mixture.
Slip clays like Barnard or Blackbird are often too coarse to make a terra sig, but might respond well to ball milling.
For the purposes of blackware firing, a properly-made Redart sig produces a very dense coating, and gives a range of colors from brick red to jet-black, and any re-oxidized spots will go back to brick red. Ball clay terra sig is slightly more porous, and in a blackware bonfiring can give intense jet-black, and any re-oxidized spots will go to gray or white.
Adding Coloring Oxides or Ceramic Stains - Using a Ball Mill
I always work with pure clay terra sigs, because they give the best shine, and I like the natural colors. Colored sigs are an appealing option, but some oxides and all commercial ceramic stains are coarsely ground, and will diminish the potential for polishing the sig. Very finely divided oxides like copper carbonate or cobalt carbonate can be added in small quantities without significant loss of shine. When using other oxides, or when using fritted ceramic stains like Mason stains , you will need to ball-mill the mix. A commercially-made ball mill is a very expensive piece of equipment, but you can make do with a large rock tumbler. Fill the reservoir one third with quartz pebbles or glass marbles (use rounded grinding media - the cylindrical grinding media is intended for dry grinding), and one third with thick, creamy consistency terra sig with the oxides or stains added, leaving one third air space. Do not overfill the reservoir or the materials will not tumble properly. Ball mill for at least 24 hours, thin a small amount to the desired consistency, and test it. If the colorants settle out, or if it does not develop a good shine, it needs to be ball milled longer. This will require experimentation on your part, because it is outside my own area of experience. Ball-milling certainly helps, but just keep in mind that no matter how much you divide the particle size of added materials, they will never be platelets, and it is only the clay platelets that develop shine. No matter what, the more non-clay contaminants you add, the less shine you will achieve.
Using Terra Sig to Coat Feet and Lid Seats
From a philosophical point of view, I like "dry-footed" wares, where you can see and feel the unglazed clay on the foot of a vessel, and I like the feel of a snug-fitting clay-to-clay lid seat. I find no advantage in a glazed foot, especially on midrange and high-fired ware, and dislike the sound and feel when you set it down on a hard surface like tile or stone. I do not care for the brittle, fragile feel and fit of a glazed lid seat, and again, I see no advantage in it. However, some claybodies high in grog can give unpleasantly rough surfaces on the exposed clay of a foot or lid seat, and you would certainly be justified in wanting a smoother surface. A good solution is to coat those parts with terra sig made from the base claybody. That way, you still have the visual and tactile contrast of unglazed clay on the foot or lid seat, but it will be relatively smooth to the touch.
Slake down scrap claybody clay overnight in ample water and mix with a drill-mounted impeller mixer, adding more water to achieve the 1.2 specific gravity initial mixture. Dont worry about sand or grog, because those will be the first components to settle out in the initial mix.
If you do not use the base claybody, select a clay appropriate to the base claybody and the intended firing temperature. Remember, an earthenware clay slip will become a glaze at midrange and high-fire temperatures. Terra sigs made from stoneware clays like Goldart or from a ball clay or kaolin will work fine up to high-fire temperatures, and even then will still give a silky smooth surface.
Using Terra Sig Under a Glaze
This last item may come as a surprise, because historically terra sig is always used alone, without a glaze, since the objective is usually the unique shine possible with a true terra sig. The clay-glaze interface is a site of considerable thermochemical activity, dependent on the firing temperature, and the flux content of the glaze. The old aphorism "the glaze feeds off the body" is especially appropriate here. As a glaze fuses, it has considerable solvent effect on the surface of the clay, and some of the surface materials are dissolved into the glaze. That's why a celadon sometimes goes brown where applied very thinly on a stoneware body - it incorporates additional iron from the body, pushing it to the darker iron color. Anyone who has done considerable slip decoration has experienced the effect where a very thin application of slip simply disappears, having been absorbed into the glaze. That's what happens with terra sig. However, like any liquid medium applied to dry greenware or to bisque-ware, terra sig will settle more thickly in recesses and textural details, and thinly on high spots and flat areas. In the thicker areas, the glaze will not dissolve the terra sig coating, and it will have a localized effect on glaze color. This could be an advantage with almost any glaze at any temperature, but it is especially useful in electric-fired lowfire and midrange work, where the exposed claybody often looks pallid and lifeless, and where the glaze often benefits from more surface activation. A terra sig can bring interesting color and surface to the unglazed areas, even at midrange and highfire temperatures, and it will give more variegation of color and visual texture in the glazed areas. If you are going to coat the foot and/or lid seats of the pot, be sure to use a terra sig appropriate for the intended firing temperature (see the section above on "Firing Ranges and Natural Clay Colors Achieved with Terra Sig"). That doesn't preclude using a Redart terra sig on cone 10 wares - it simply requires that you use wax resist or sponge off the foot and/or lid seats.
Caveat
I call the product of this method "super refined terra sig," and I believe that to be true, in comparison to many of the terra sig recipes out there. But it has come to my attention that the glassy surfaces seen on classic ancient Greek red-figure and black-figure wares were achieved with little or no polishing, and thus the terra sig must have been refined to a much greater degree. At some point I'll do further research into that process.
A well-prepared terra sigillata is truly a remarkable medium. It has become a popular option in contemporary ceramics throughout the US, Canada, Europe, Australia, and New Zealand. Polished terra sig finishes have become especially popular in pit-firing, bonfiring, sagger, sawdust-smoking, raku, and horsehair effects. Whatever you do with terra sig, you are part of a 4000-year tradition that continues to evolve. If you discovery interesting new effects or uses in your experiments, Id love to hear about them at
[email protected].
Vince Pitelka,
Smithville, Tennessee
October 5, 2005
Notes from other sources:
Distilled Water is recommended for creating Terra Sigillata to avoid calcium and other unwanted elements.
Deflocculant: Calgon was used in the past. It's formula has changed and no longer works.
Darvan 7 (lighter) or Darvan 811 (red) or a the mixture of Soda Ash and Sodium Silicate described above.
If you are using Darvan you may need to use a bit more of it than the sodium sillicate and ash combination.
Darvan is more expensive but it has the advantage of not plugging up molds if you are using your deflocculant for your casting slip as well.
|
